学习 NanoBot
定入口
首先确定项目的入口,可从 pyproject.toml 文件中的入口字段知晓。
pyproject.toml:
[project.scripts]
nanobot = "nanobot.cli.commands:app"
项目入口为 nanobot.cli.commands:app。
commands.py在项目结构中: 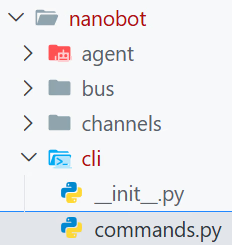
nanobot/cli/commands.py:
app = typer.Typer(
    name="nanobot",
    help=f"{__logo__} nanobot - Personal AI Assistant",
    no_args_is_help=True,
)
这里的app就是项目的入口了,这是用名为Typer的库创建了一个CLI应用。
发现特性
既然是一个CLI应用,必然有很多参数,接下来看看有哪些特性。
发现一个装饰器@app.command:
# ============================================================================
# Onboard / Setup
# ============================================================================
@app.command()
def onboard():
    """Initialize nanobot configuration and workspace."""


# ============================================================================
# Gateway / Server
# ============================================================================
@app.command()
def gateway():
    """Start the nanobot gateway."""

# ============================================================================
# Agent Commands
# ============================================================================
@app.command()
def agent():
    """Interact with the agent directly."""

# ============================================================================
# Channel Commands
# ============================================================================
channels_app = typer.Typer(help="Manage channels")
app.add_typer(channels_app, name="channels")

@channels_app.command("status")
def channels_status():
    """Show channel status."""

@channels_app.command("login")
def channels_login():
    """Link device via QR code."""


# ============================================================================
# Status Commands
# ============================================================================
@app.command()
def status():
    """Show nanobot status."""


# ============================================================================
# OAuth Login
# ============================================================================
provider_app = typer.Typer(help="Manage providers")
app.add_typer(provider_app, name="provider")

@provider_app.command("login")
def provider_login():
"""Authenticate with an OAuth provider."""| 层级 | 名称 | 类型 | Docstring |
|---|---|---|---|
| 主应用 | onboard | Command | Initialize nanobot configuration and workspace. |
| 主应用 | gateway | Command | Start the nanobot gateway. |
| 主应用 | agent | Command | Interact with the agent directly. |
| 主应用 | status | Command | Show nanobot status. |
| Group | channels | Subcommand Group | Manage channels |
| ├─ 子命令 | channels status | Command | Show channel status. |
| └─ 子命令 | channels login | Command | Link device via QR code. |
| Group | provider | Subcommand Group | Manage providers |
| └─ 子命令 | provider login | Command | Authenticate with an OAuth provider. |
核心逻辑
从中可以看到名为 agent 的command,从这里下手应该可以找到这个项目的核心所在——智能体核心逻辑。
agent_loop = AgentLoop(...)
"""
The agent loop is the core processing engine.

It:
1. Receives messages from the bus
2. Builds context with history, memory, skills
3. Calls the LLM
4. Executes tool calls
5. Sends responses back
""AgentLoop是此智能体项目的核心处理引擎,其从bus(某种总线?)接受消息,使用历史记录、记忆和技能(skill)来构建上下文,进行大模型请求,执行工具,送回响应。
没错,这个agent就是运行智能体的命令,此命令支持两种交互方式:
- 通过 -m 运行一次性的任务
- 不带 -m,持续交互 若用户执行命令时指定了-m参数,则agent函数的参数messages就会有值。通过判断messages变量是否有值即可判断用户想使用的交互模式。
一次性
    if message:
        # Single message mode — direct call, no bus needed
        async def run_once():
            with _thinking_ctx():
                response = await agent_loop.process_direct(message, session_id, on_progress=_cli_progress)
            _print_agent_response(response, render_markdown=markdown)
            await agent_loop.close_mcp()

        asyncio.run(run_once())
###
agent_loop.process_direct(...)
'''Process a message directly (for CLI or cron usage).'''在asyncio异步运行时中运行异步函数run_once(),进行一次性agent的交互。 携带着思考的上下文_thinking_ctx(),运行agent并获取结果agent_loop.process_direct(),打印结果_print_agent_response(),优雅关闭MCPagent_loop.close_mcp()。
看到这里,我在思考接下来应该看看持续交互的逻辑呢,还是继续深入,看看process_direct()方法的内容呢?
最后决定还是先看这个方法,因为这个是更加深入智能体核心逻辑的方向。
process_direct
在一次性交互中,传递给此方法的参数是message, session_id, on_progress=_cli_progress。
- message:在命令中,通过-m/--message传递来的消息
- session_id:在命令中,通过-s/--session传递来的会话ID,默认值是
cli:direct。 - 先不研究……
    async def process_direct(
        self,
        content: str,
        session_key: str = "cli:direct",
        channel: str = "cli",
        chat_id: str = "direct",
        on_progress: Callable[[str], Awaitable[None]] | None = None,
    ) -> str:
        """Process a message directly (for CLI or cron usage)."""
        await self._connect_mcp()
        msg = InboundMessage(channel=channel, sender_id="user", chat_id=chat_id, content=content)
        response = await self._process_message(msg, session_key=session_key, on_progress=on_progress)
        return response.content if response else ""
注意!在一次性交互中,传递了两个位置参数(message和session_id)和一个关键字参数(on_progress)。
- 异步调用
_connect_mcp,连接配置好的MCP服务器 - 创建一个InboundMessage类型的对象,命名为msg
- 异步调用
_process_message方法的结果并存储为response - 返回结果
process_message
乍一看,这个函数的代码很多,从330行到453行,但此刻我只看一次性交互相关的内容,其中的一些代码是持续交互才需要的。
第一个判断,if msg.channel == "system",一次性交互的值是cli,所以这一大块可以跳过。
来到第356行代码,这里做了一个预览,逻辑很简单,就是说如果用户输入的内容超过了80个字,则只保留前80个字,后面的内容在展示的时候直接变成省略号。
第357行代码,使用logger打了一个info级别的日志,告知正在处理来自什么渠道的、谁发的、什么内容的信息。预览原来是用在信息内容中的。
preview = msg.content[:80] + "..." if len(msg.content) > 80 else msg.content
logger.info("Processing message from {}:{}: {}", msg.channel, msg.sender_id, preview)
359-360,根据session_key创建session。
        key = session_key or msg.session_key
        session = self.sessions.get_or_create(key)
###
'''A conversation session.

Stores messages in JSONL format for easy reading and persistence.

Important: Messages are append-only for LLM cache efficiency. The consolidation process writes summaries to MEMORY.md/HISTORY.md but does NOT modify the messages list or get_history() output.'''
362-394,定义了斜杠命令。
        # Slash commands
        cmd = msg.content.strip().lower()
        if cmd == "/new":...
if cmd == "/help":...乍一看有点复杂,涉及到了锁,但是看到返回消息时就明了了。这个斜杠命令是用来控制会话的,/new代表创建新会话,创建新会话势必要持久化存储旧会话,这一大堆代码就是用来处理相关问题的(存储失败了怎么办)。
396-412,整合记忆。
        unconsolidated = len(session.messages) - session.last_consolidated
        # 计算未整合的消息条数
        if (unconsolidated >= self.memory_window and session.key not in self._consolidating): # 若未整合的消息条数大于等于记忆窗口且当前会话没有进行中的整合
            self._consolidating.add(session.key) # 添加当前会话到整合队列?
            lock = self._consolidation_locks.setdefault(session.key, asyncio.Lock()) # 设置锁

            async def _consolidate_and_unlock():
                try:
                    async with lock:
                        await self._consolidate_memory(session) # 整合记忆
                finally:
                    self._consolidating.discard(session.key)
                    _task = asyncio.current_task()
                    if _task is not None:
                        self._consolidation_tasks.discard(_task)


            _task = asyncio.create_task(_consolidate_and_unlock())
            self._consolidation_tasks.add(_task)
414,为所有需要上下文的工具更新上下文。 415-417,获取消息工具?